Conversion-Tag-Implementation

Implement fraud0 Conversion Tag
fraud0 Conversion Tag
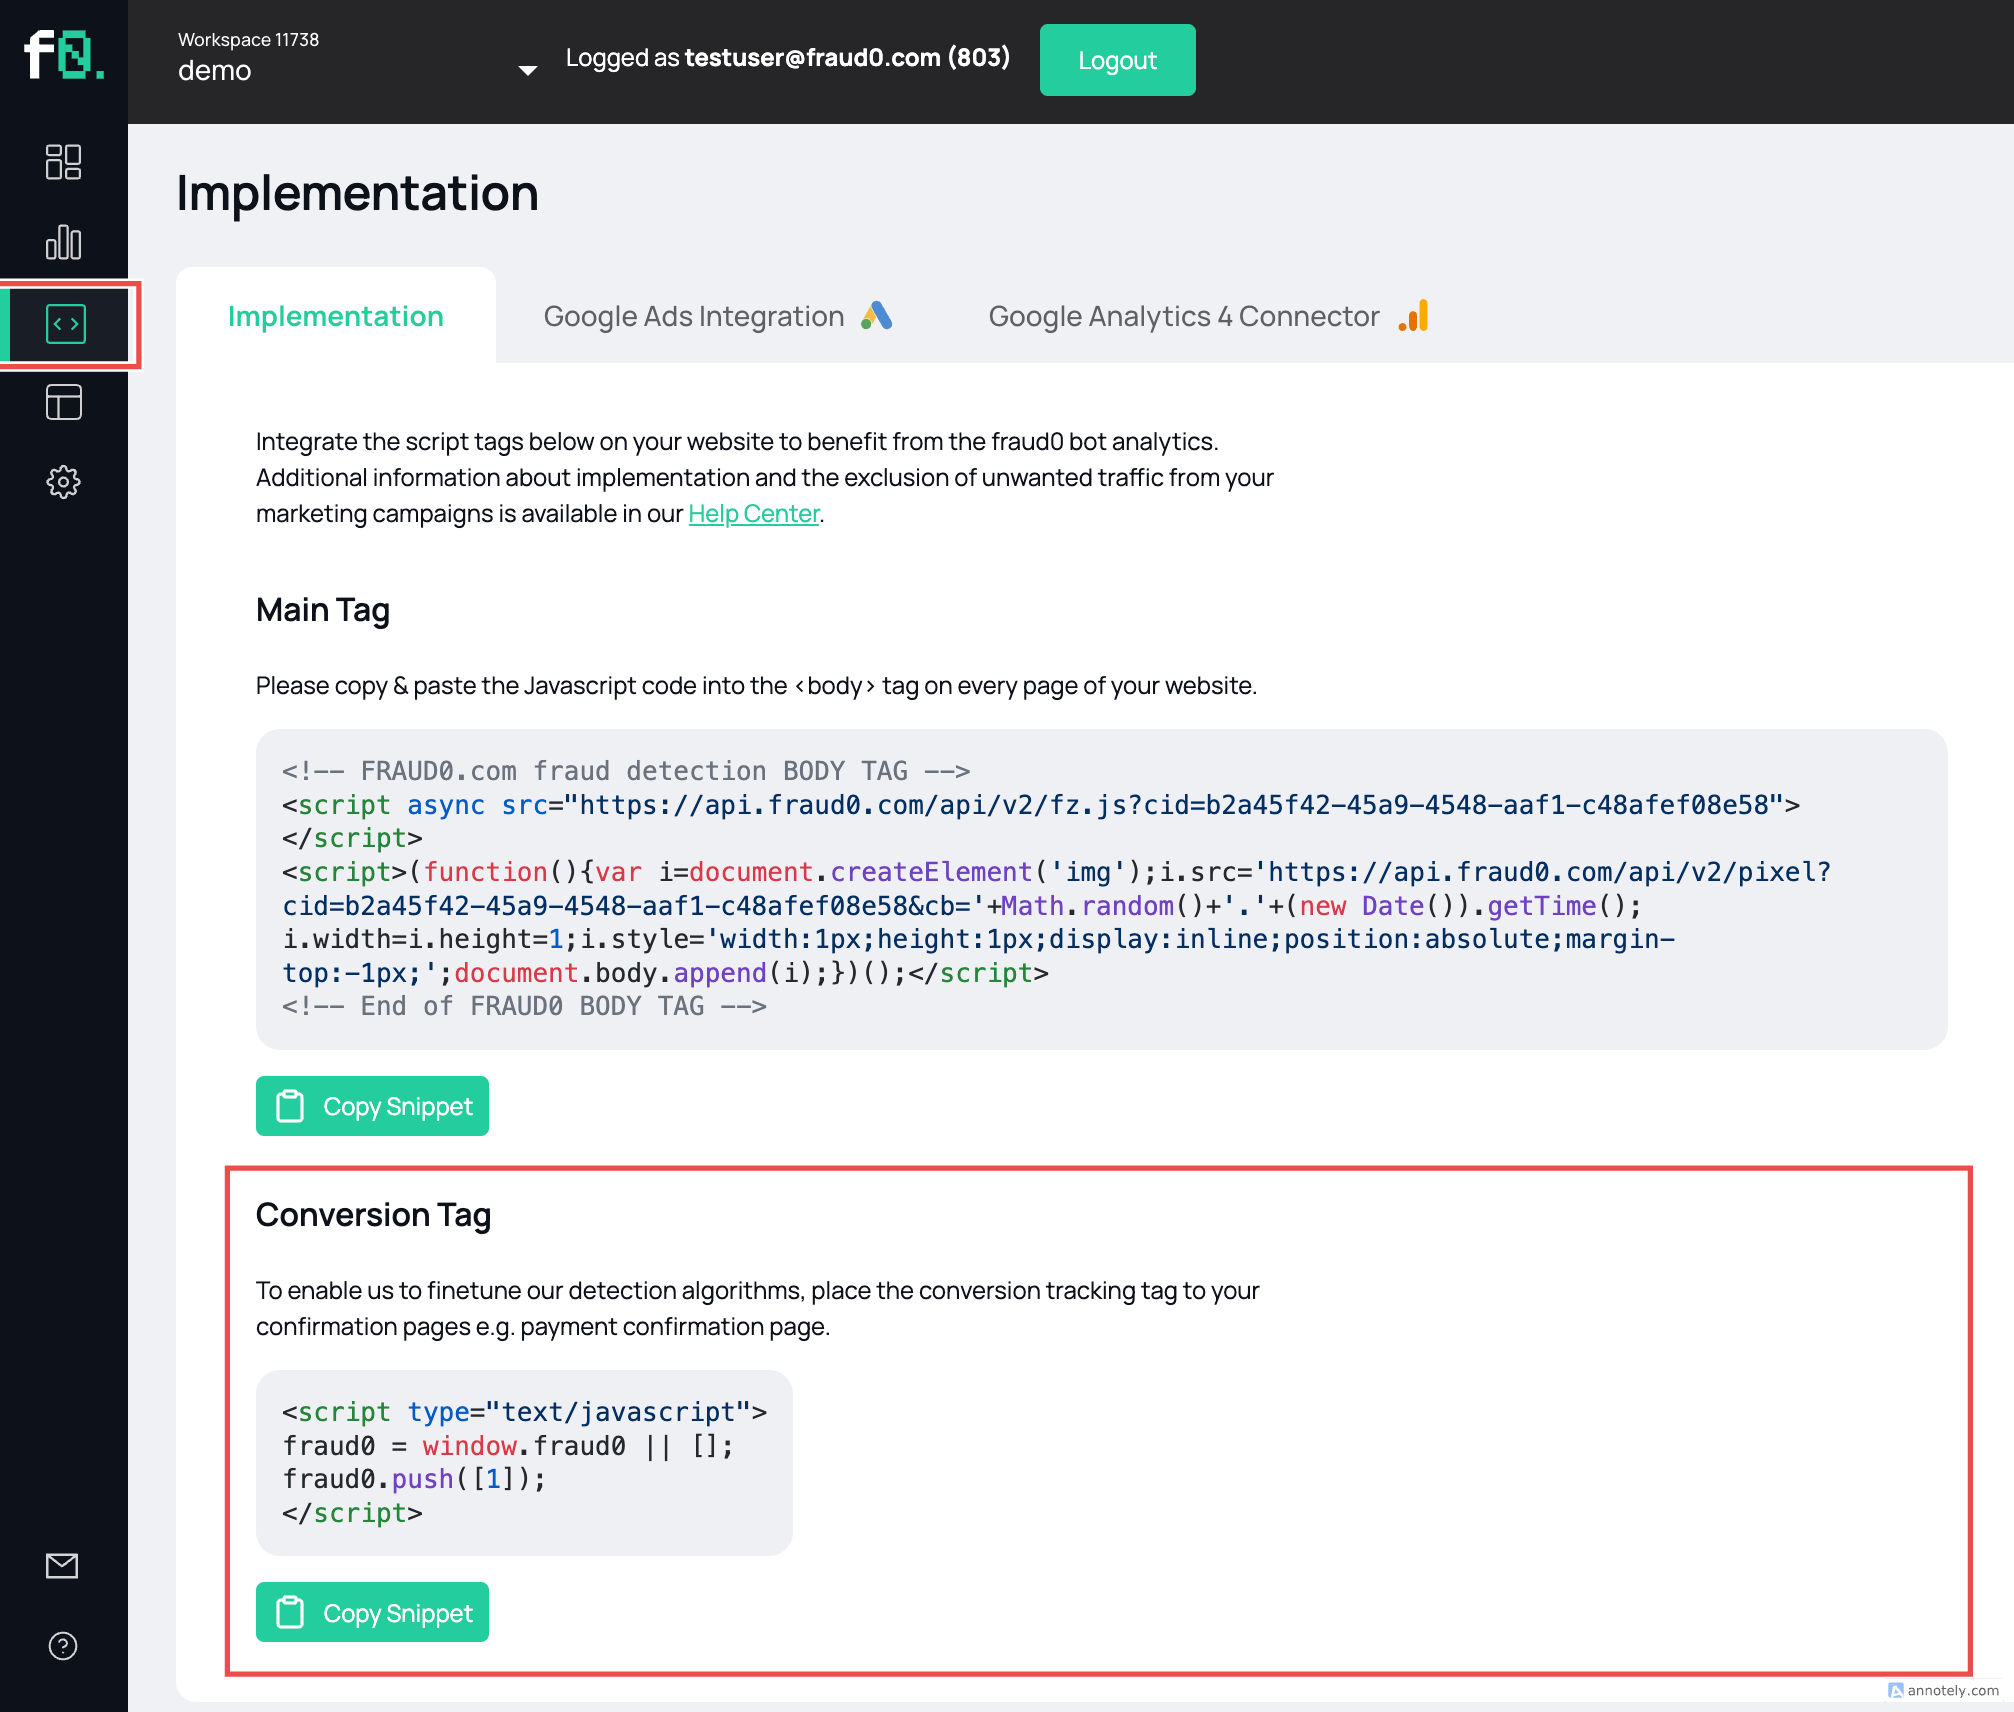
This code enables us to fine-tune our detection algorithms, by tagging sessions that lead to a conversion we can detect false-positives, i.e. when a session marked as a bot performs an action only a real user would do. Please place the Conversion Tag on your confirmation pages, e.g. payment confirmation page.
fraud0 offers two methods for implementing the Conversion Tag:
To get the most out of our conversion tag, you can customize the tag to match your company's personal preferences. Customization gives you the ability to create several different conversion tags and track your leads, purchases, or other events as you see fit.
Various customization options: Customize your Conversion Tags
Select either Option A or Option B
Option A
Implement fraud0 Conversion Tag via Google Tag Manager (GTM)
Step 1: Get your fraud0 Conversion Tag code
Login to your fraud0 Dashboard
Navigate to Implementation
You can find the code in the Conversion Tag section
Copy the code

Step 2: Add a new tag in Google Tag Manager
Go to your Google Tag Manager Workspace
Navigate to Tags (1) and click New (2) in the top-right corner
.jpg?inst-v=aaf91e11-f2af-4ef7-bbb7-511b89a9e06b)
Name the new tag F0 Conversion Tag
Open Tag Configuration and select Custom HTML
.jpg?inst-v=aaf91e11-f2af-4ef7-bbb7-511b89a9e06b)
Paste your code from Step 1 into the HTML field (1)
Check Support document.write (2)
Set Tag firing priority to 800 (3) in Advanced Settings
Set Triggering to the equivalent purchase trigger from your website (e.g. a trigger based on your confirmation page or a specific purchase event)
.jpg?inst-v=aaf91e11-f2af-4ef7-bbb7-511b89a9e06b)
Click on Save
Option B
Implement fraud0 Conversion Tag directly on your website
Implement fraud0 Conversion Tag Code
Login to your fraud0 Dashboard
Navigate to Implementation
You can find the code in the Conversion Tag section
Copy and paste the JavaScript code into the
<body>tag on every confirmation page of your website
.png?inst-v=aaf91e11-f2af-4ef7-bbb7-511b89a9e06b)
Conversion Tag Customization
Customize your Conversion Tags
To get the most out of our conversion tag, you can customize the tag to match your company's personal preferences. Customization gives you the ability to create several different conversion tags and track your leads, purchases, or other events as you see fit. The number of different conversion tags is currently not limited.
To customize, you can set different conversion types and additionally pass a conversion ID.
The ConversionType and ConversionID fields will also be available as dimensions in the reports in order to run corresponding analyses on this basis. Paid marketing channels or campaigns can be analysed in this way. Analyses regarding fraud conversions are also possible.
Explanation of parameters
Conversion Type: A string that describes the type of conversion being tracked (e.g., 'lead', 'purchase', 'signup', 'custom_conversion')
Conversion ID: A unique identifier for the specific conversion instance being tracked (e.g., 'lead123', 'order12345', 'signup123', 'custom123'). Specifying a Conversion ID is optional.
Basic Conversion Tracking Tag
The basic tracking tag initializes the tracking and is used to report a generic conversion.
Basic Tag Example:
<script type="text/javascript">
fraud0 = window.fraud0 || [];
fraud0.push([1]);
</script>
Tracking Different Conversion Events
To track different types of conversion events, you can modify the fraud0.push parameters.
Below are examples of common conversion events.
Lead Conversion (without a conversion ID)
Tracks when a lead is generated.
<script type="text/javascript">
fraud0 = window.fraud0 || [];
fraud0.push(['lead']);
</script>
Purchase Conversion (with a conversion ID)
Tracks when a purchase is made.
<script type="text/javascript">
fraud0 = window.fraud0 || [];
fraud0.push(['purchase', 'order12345']);
</script>
Signup Conversion (with a conversion ID)
Tracks when a user signs up.
<script type="text/javascript">
fraud0 = window.fraud0 || [];
fraud0.push(['signup', 'signup123']);
</script>
Custom Conversion (with a conversion ID)
Tracks a custom conversion with a specified type and ID.
<script type="text/javascript">
fraud0 = window.fraud0 || [];
fraud0.push(['custom_conversion', 'custom123']);
</script>
Next Steps
Need support?
Do you still have questions or require further details? Contact our support team for assistance!
