This guide helps you to connect fraud0 with your Google Analytics (Universal Analytics) account. This set up is optional. There are a total of 3 steps you need to take to display invalid traffic in Google Analytics.
Implement Google Analytics Tag (UA) (Step 1/3)
Check the Custom Event (Step 2/3)
Create New Audience (Step 3/3)
Implement Google Analytics (UA) Tag in Google Tag Manager (Step 1/3)
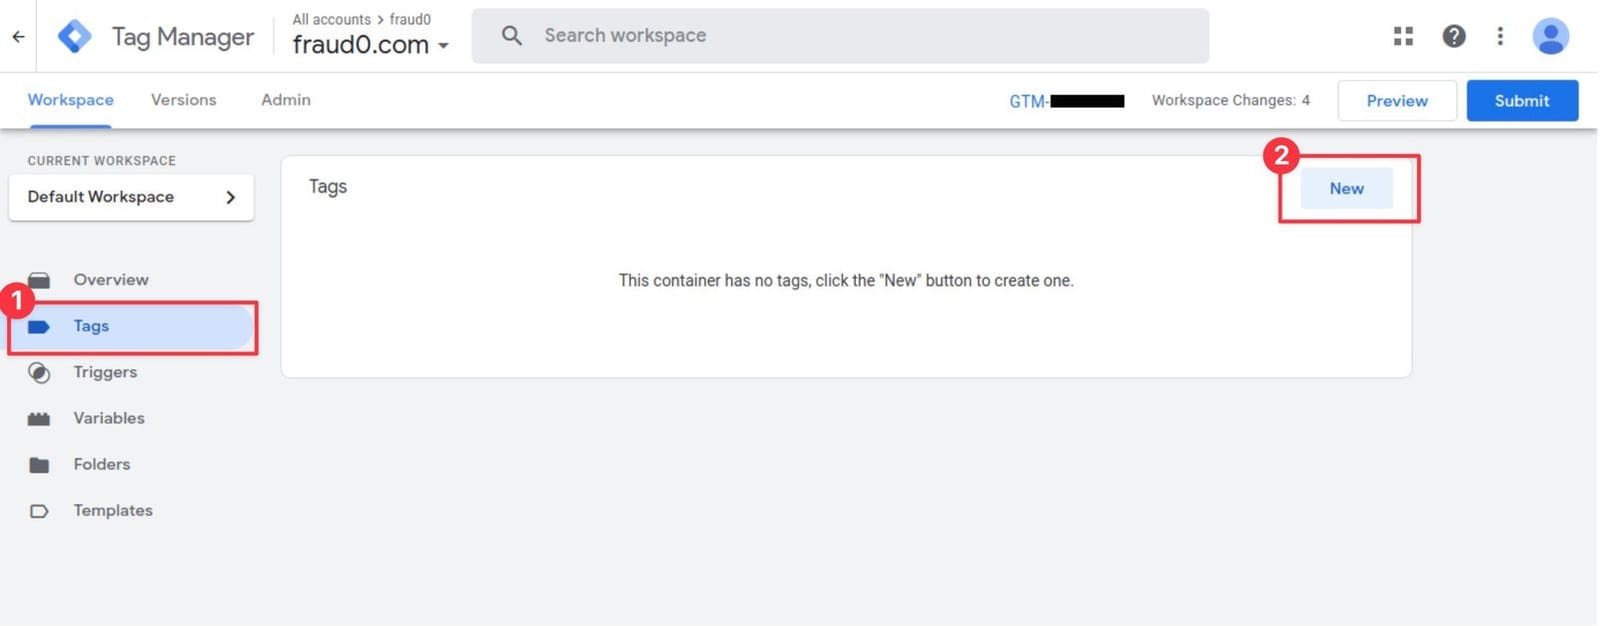
Navigate to Tags (1) and click New (2) in the top-right corner
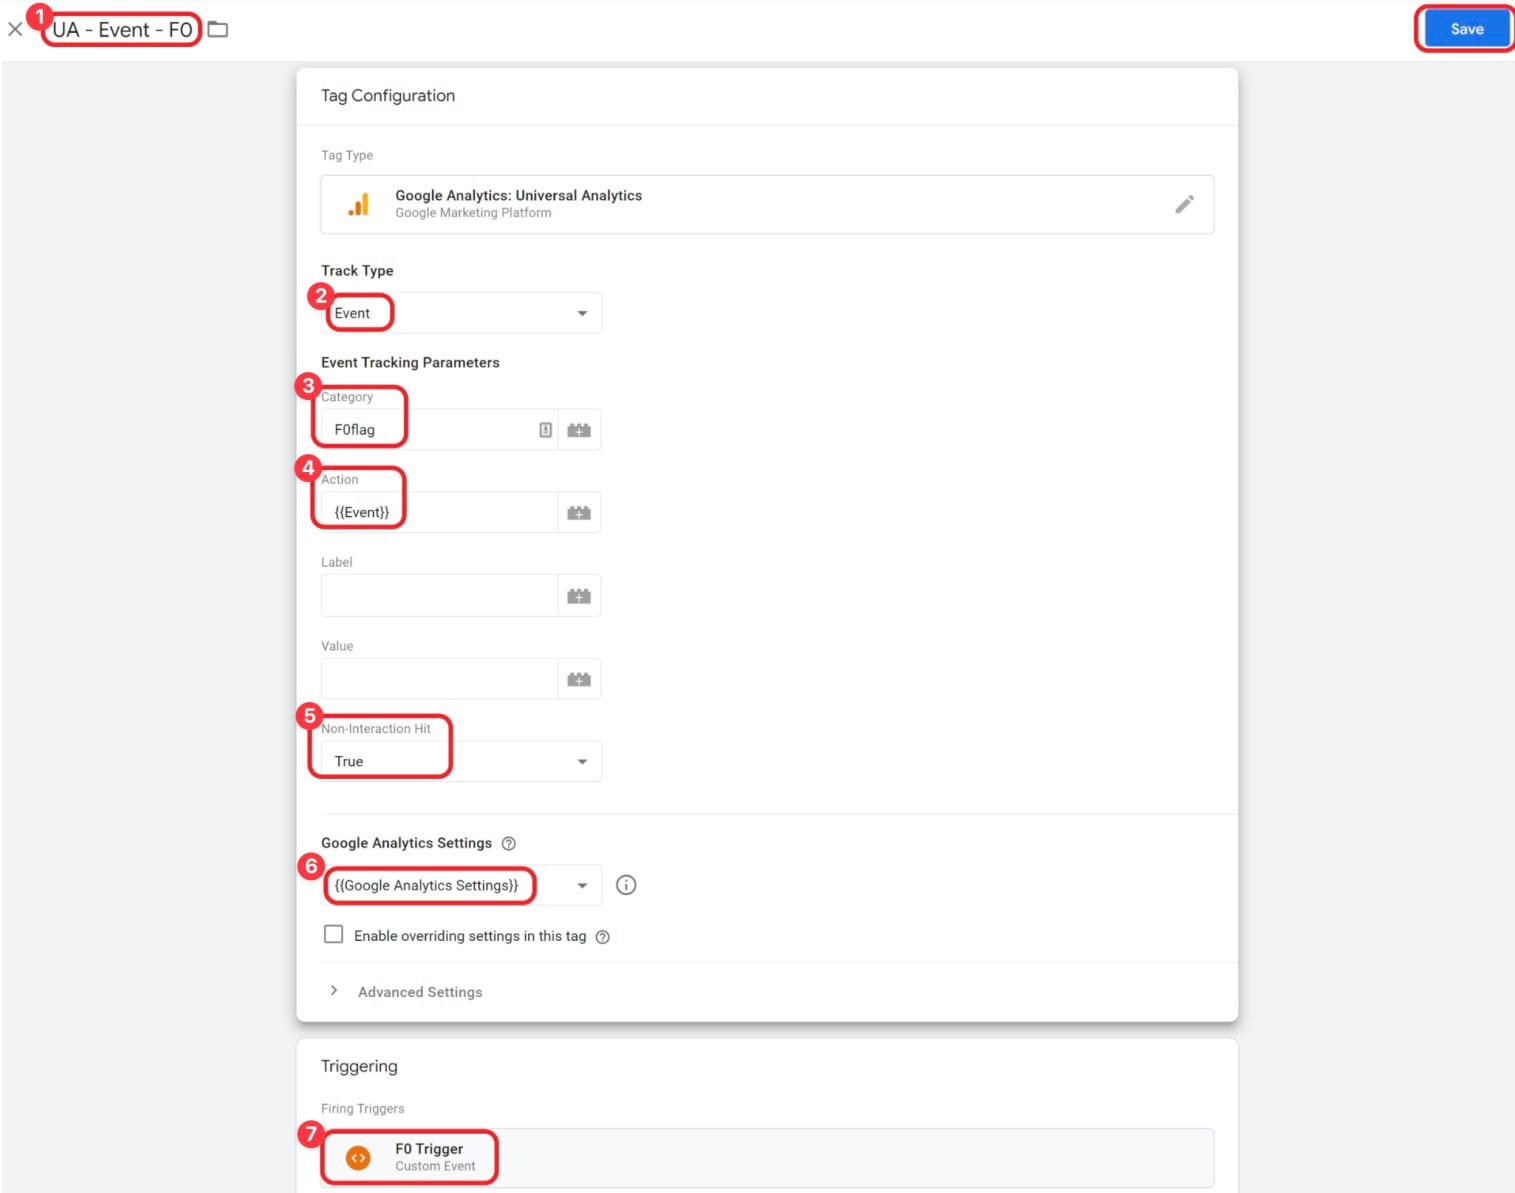
Within the Tag Configuration section select Google Analytics: Universal Analytics
Give your tag a name (e.g. UA - Event - fraud0 (1)) and choose Track Type Event (2)
Name the value for Category “F0flag” (3) (or something similar) and use the built-in-variable {{Event}}for the parameter Action (4) to get the event name as the value
Set Non-Interaction Hit to “True” (5)
Select your Google Analytics Settings variable (6) within the Google Analytics Settings section
In the Triggering section you need to assign the F0 Trigger (7) you have created before
Check the Custom Event in Google Analytics (UA) (Step 2/3)
To create the fraud0 Audience in Google Analytics, which can later be used in Google Ads, you need to trigger the custom event with the Google Analytics Tag first and check if the event is properly sent to your property.
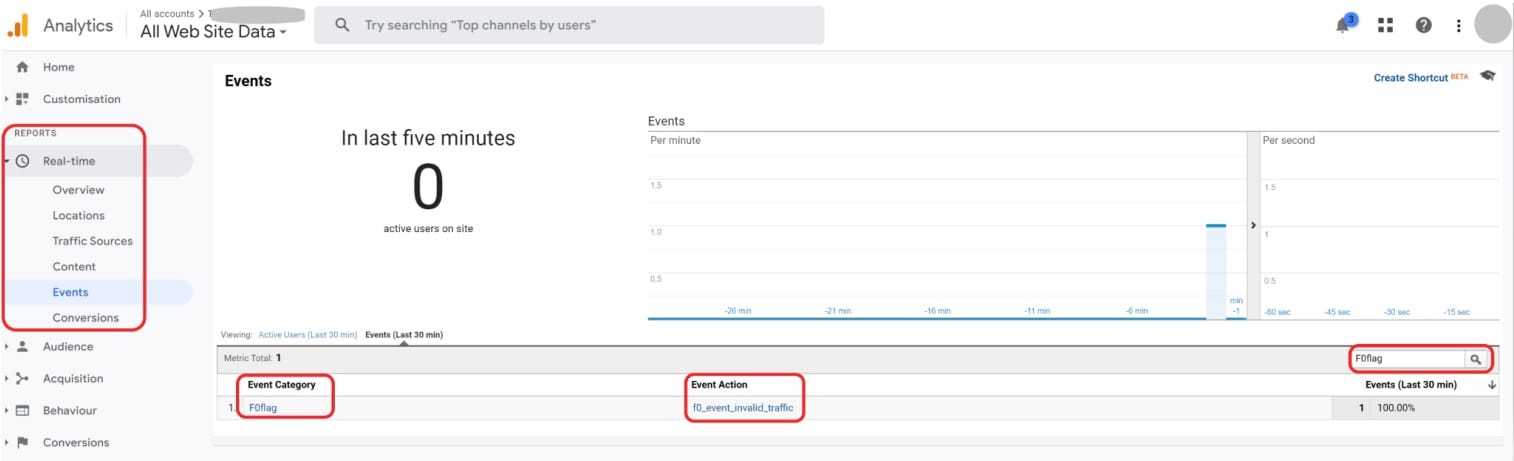
Navigate to your property and go to Events in the Real Time section in the left-hand navigation menu
If you get plenty of events into your account, it might be helpful to use the search field on the right side of the report and search for the value you’ve set for the event category here: “F0flag”.
Now you should be able to see the F0-event.
Create New Audience in Google Analytics (UA) (Step 3/3)
Follow these steps to create a new audience in Google Analytics for the audience exclusion.
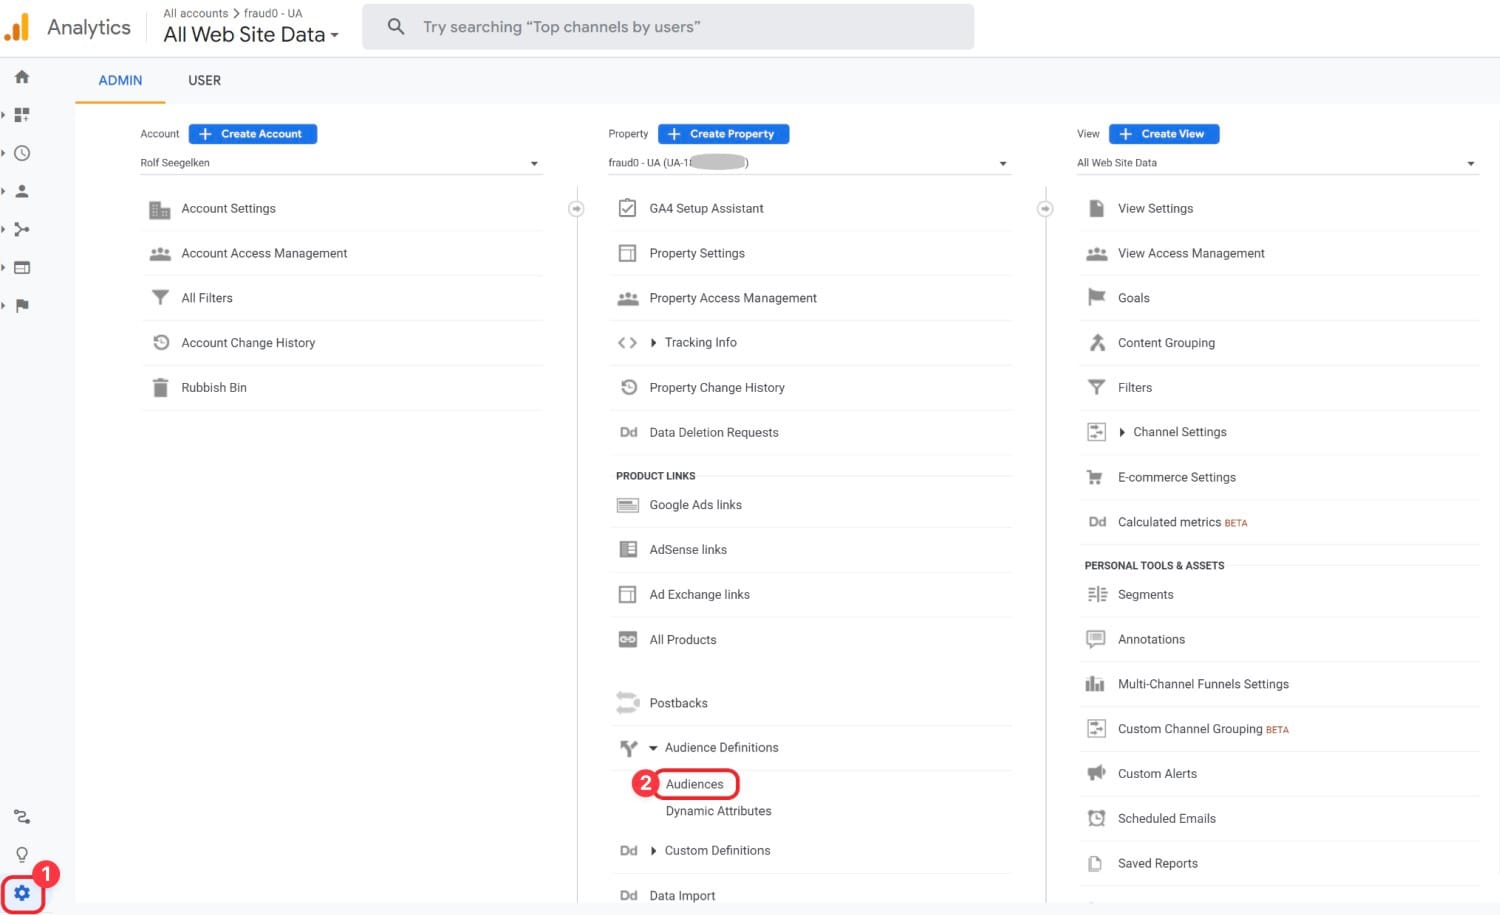
Click on the Settings symbol (1) in the lower-left corner in Google Analytics and then on Audiences (2) in the Audiences Definition section within the Property settings
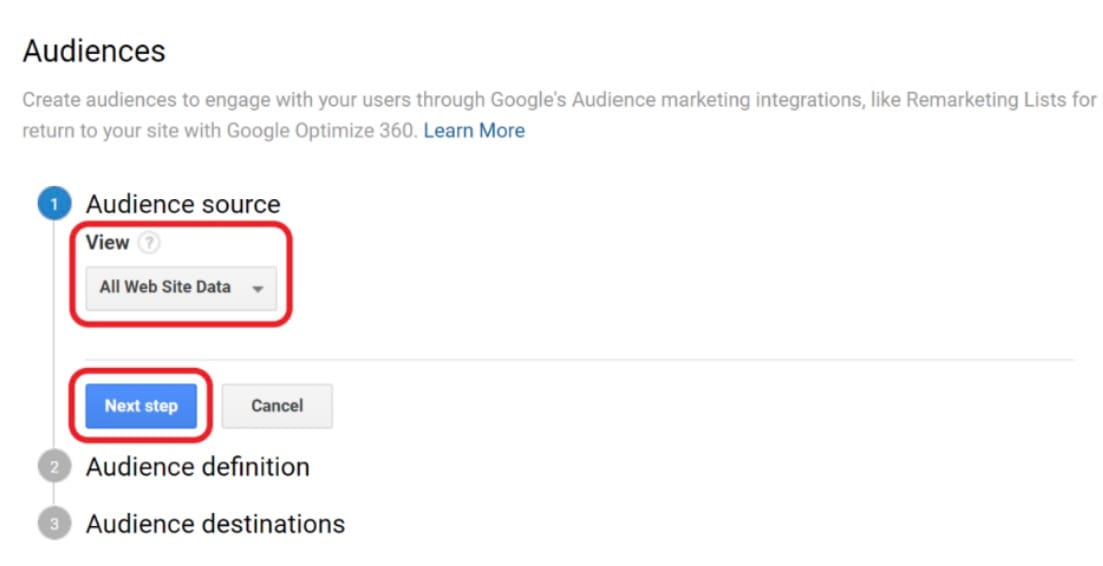
Choose a View, which receives the F0-event (in most cases it will be your master view), in the first step Audience source
Click Next step
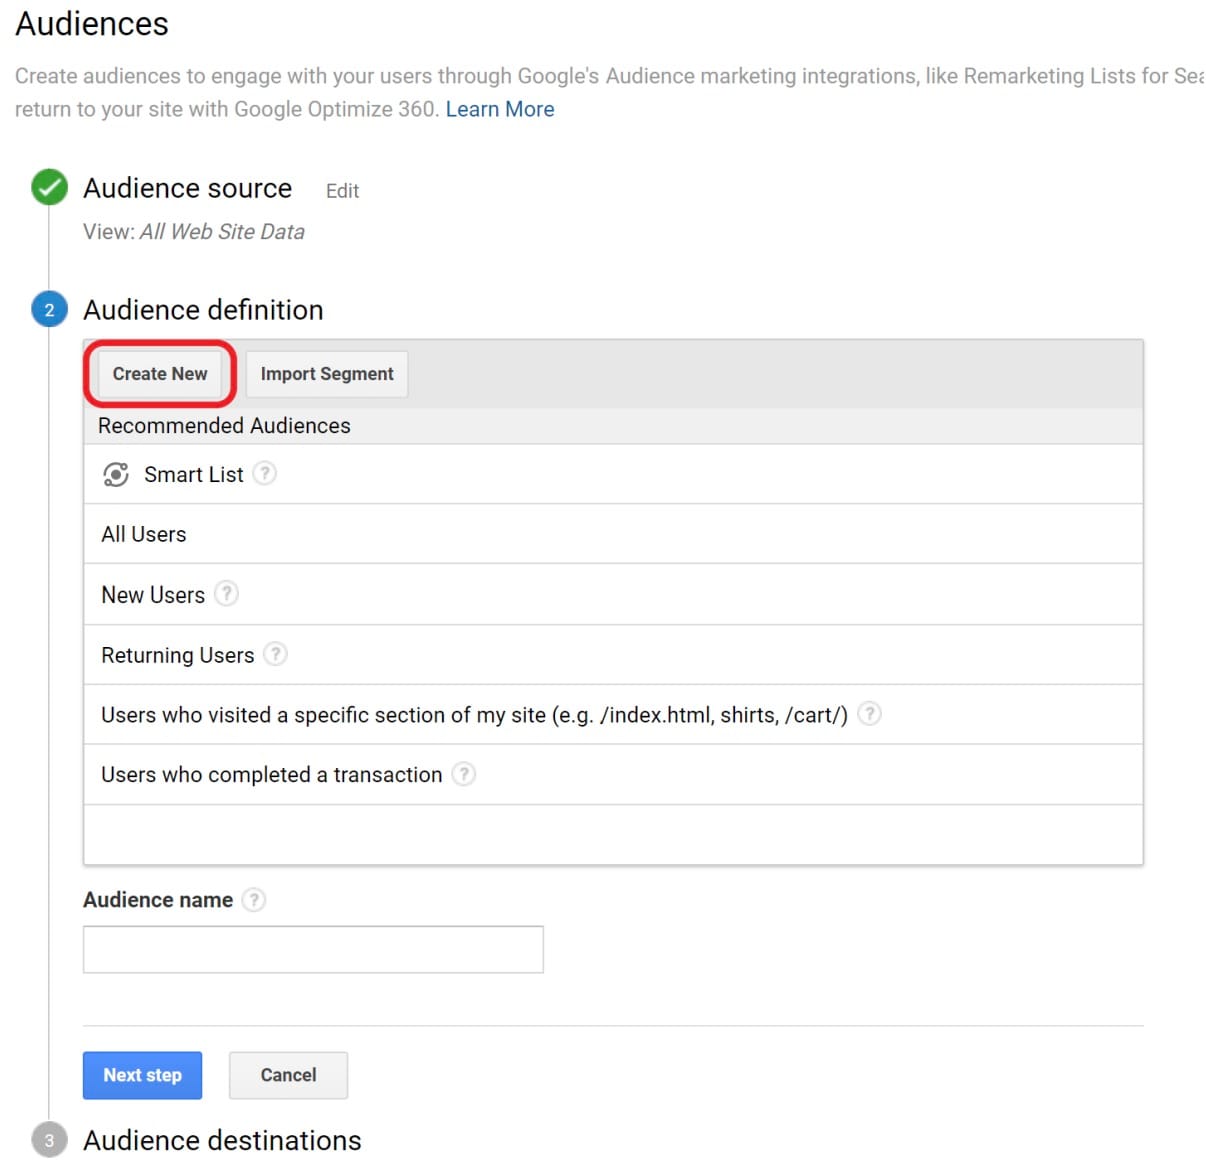
In the Audience Definition step first click on Create new
Click Next step
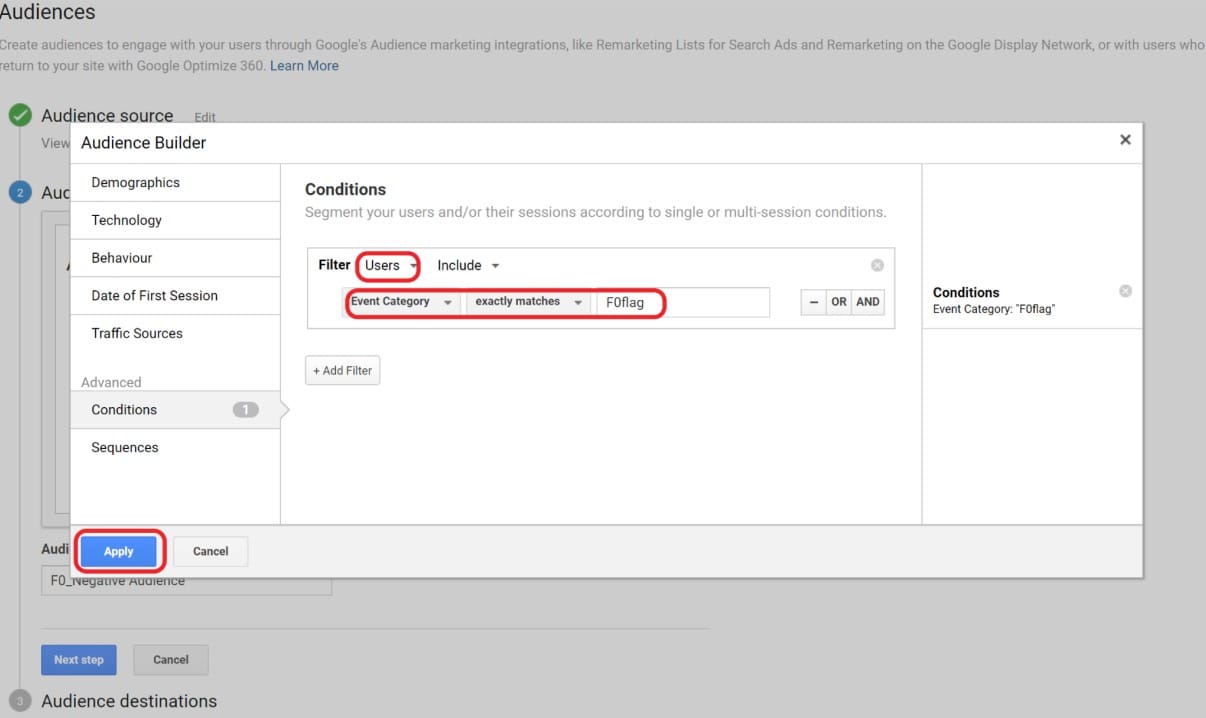
An overlay provides you now with the possibility to define the audience.
Set the Filter scope to Users and keep Include
Select Event Category as dimension, exactly matching as operator and F0flag as value
Click on Apply to save the configuration
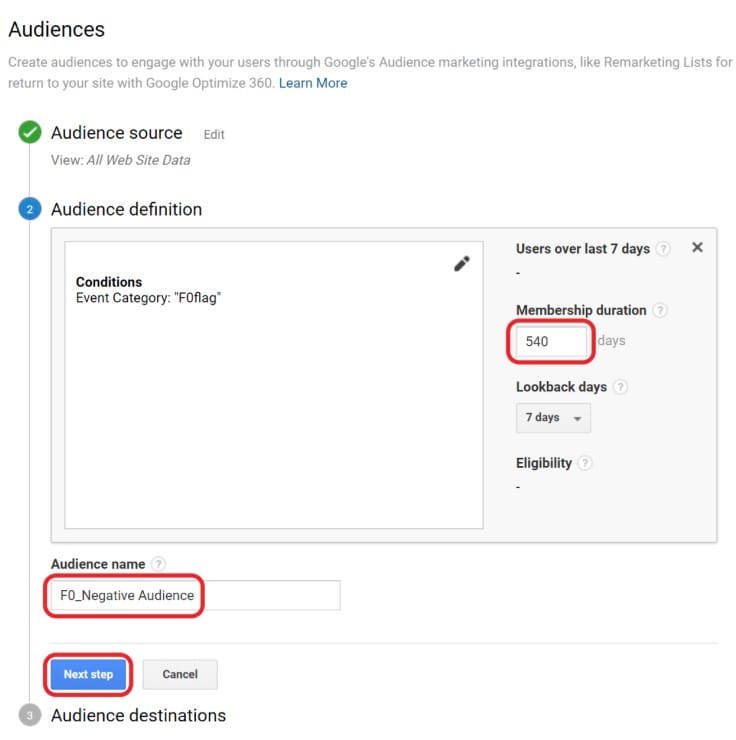
You should furthermore extend the Membership duration to the maximum value of 540 days
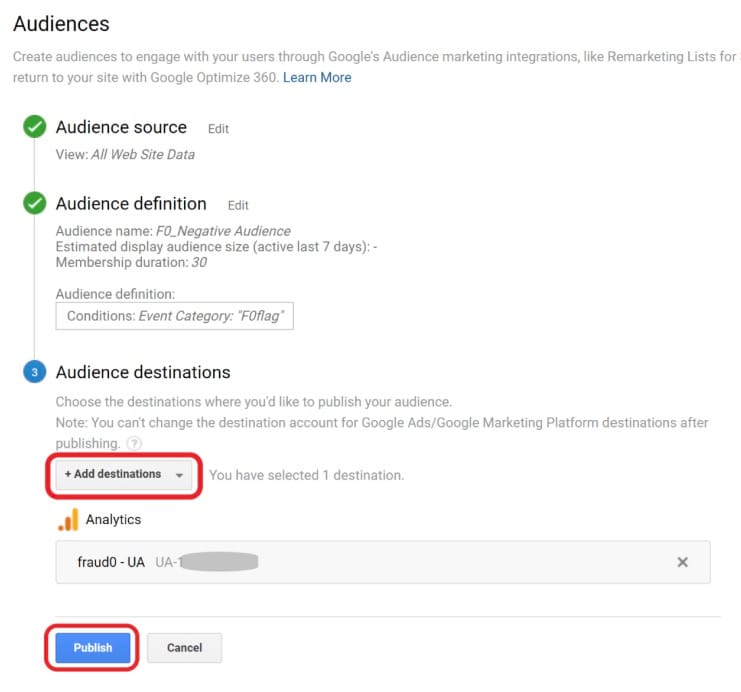
Name your audience “F0_Negative Audience”
Click on Next step
Now select the destination(s), in which you want to use the newly created audience, by clicking on the “+ Add destinations” dropdown menu