Step 4 — Implement the Conversion Tag
The Conversion Tag is optional but highly recommended. It tells fraud0 which sessions led to real conversions — and that signal is what allows the detection model to identify false positives (a session initially flagged as a bot that closed a sale was almost certainly not a bot).
Place the Conversion Tag only on confirmation pages (post-checkout, post-form-submit, post-signup) — not on every page.
Conversion tag types
Section titled “Conversion tag types”Basic conversion
Section titled “Basic conversion”Use this if you only need to know that a conversion happened, not what kind.
<script type="text/javascript"> fraud0 = window.fraud0 || []; fraud0.push([1]);</script>Lead generation
Section titled “Lead generation”Push the form name as the second argument to report on conversions per form.
<script type="text/javascript"> fraud0 = window.fraud0 || []; fraud0.push(['lead', '{{form name}}']);</script>In GTM, replace {{form name}} with a Data Layer Variable holding the form identifier (e.g. contact_form, newsletter_signup, whitepaper_download).
Purchase
Section titled “Purchase”Push purchase plus the order ID. The order ID appears in fraud0 reports and lets you reconcile conversions against your backend.
<script type="text/javascript"> fraud0 = window.fraud0 || []; fraud0.push(['purchase', '{{order id}}']);</script>Signup
Section titled “Signup”<script type="text/javascript"> fraud0 = window.fraud0 || []; fraud0.push(['signup', '{{signup id}}']);</script>Custom conversion type
Section titled “Custom conversion type”For anything that is neither a lead nor a purchase — e.g. “free trial activated”, “account upgraded”, “waitlist confirmed”.
<script type="text/javascript"> fraud0 = window.fraud0 || []; fraud0.push(['{{conversion type}}', '{{conversion id}}']);</script>Common conversion types: trial_started, subscription_renewed, whitepaper_download, quote_requested, appointment_booked.
Multiple conversion types on the same page
Section titled “Multiple conversion types on the same page”If a single confirmation page can represent more than one conversion type, push them as separate entries:
<script type="text/javascript"> fraud0 = window.fraud0 || []; fraud0.push(['purchase', '{{order id}}']); fraud0.push(['newsletter_signup', '{{email hash}}']);</script>Deployment
Section titled “Deployment”The same two-variant logic from Step 3 applies to the Conversion Tag.
Variant A — Direct embed
Section titled “Variant A — Direct embed”-
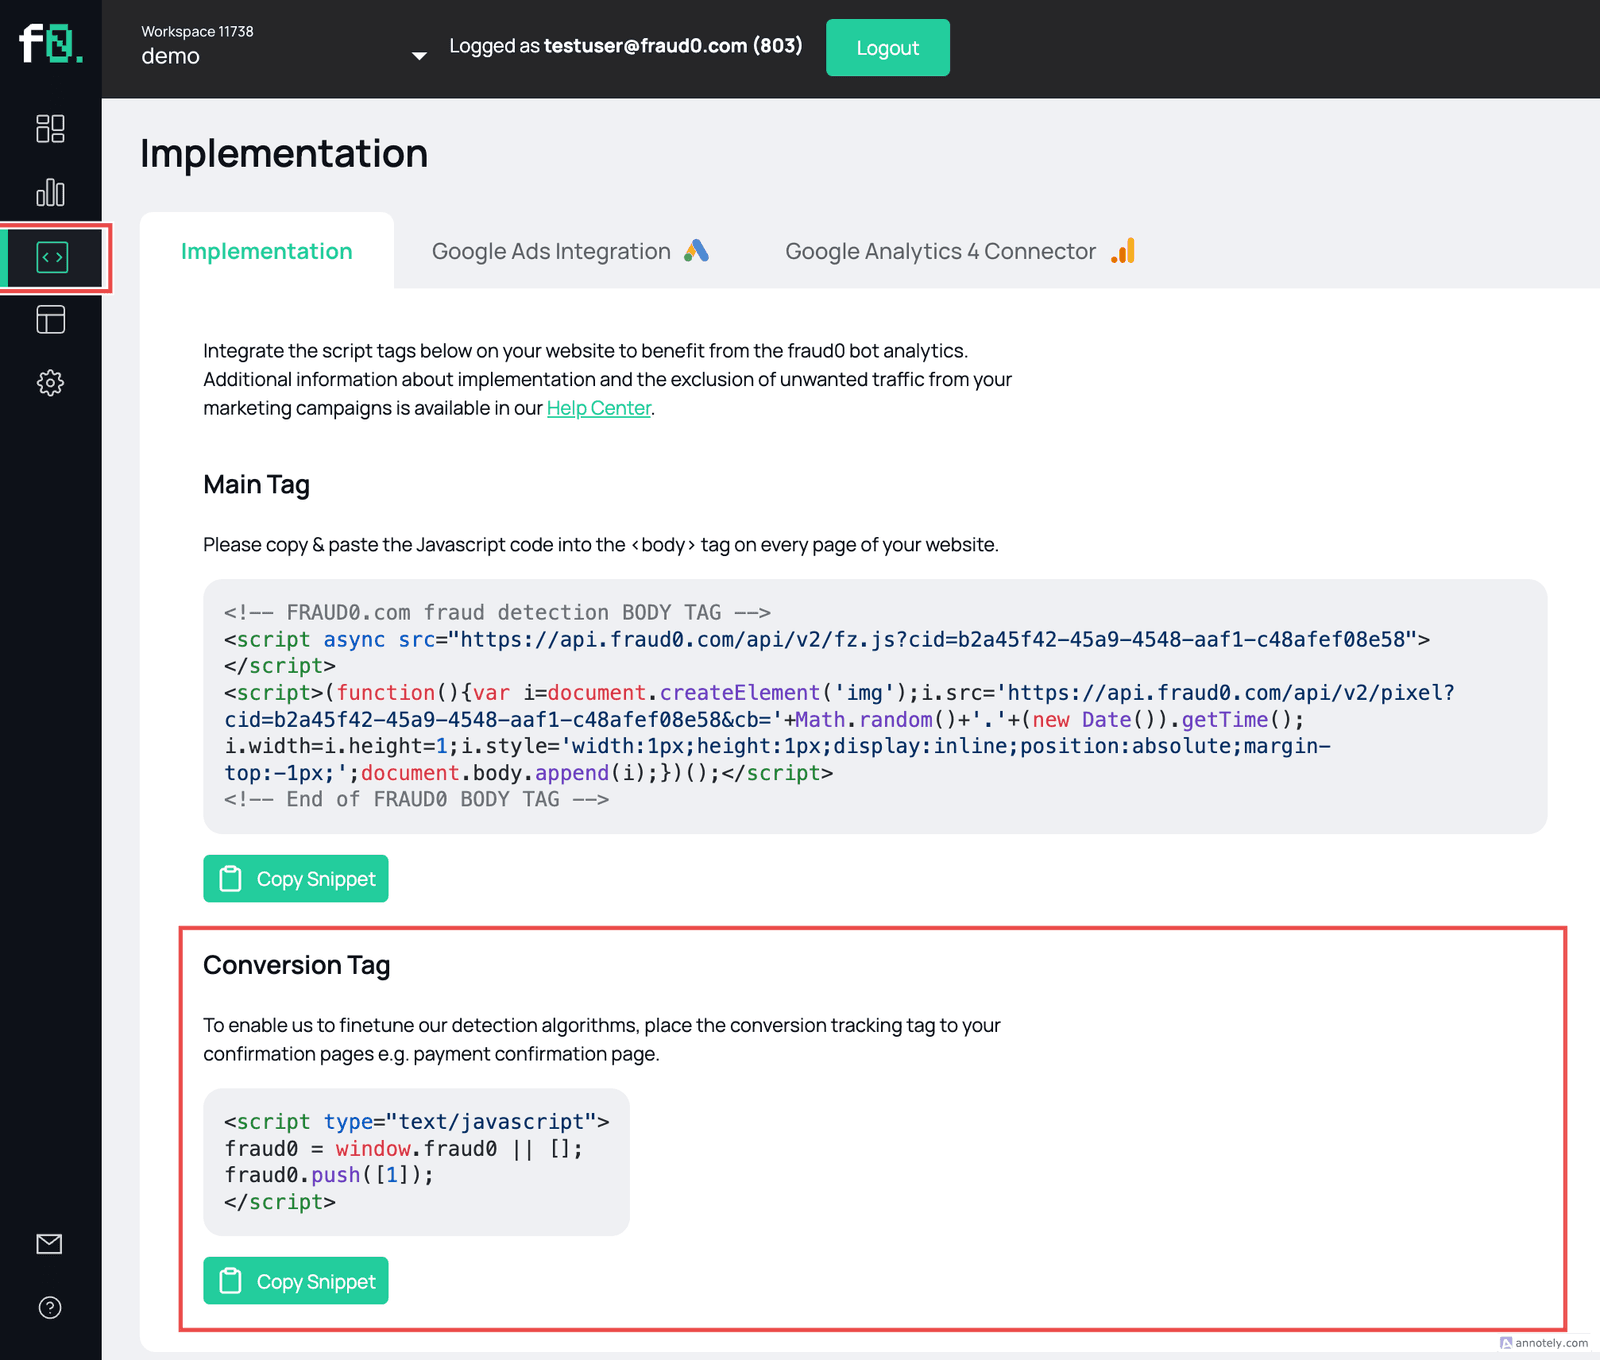
Log in to your fraud0 Dashboard, select your tag, and open Integrations → Tag Management → copy the code from the Conversion Tag section.
-
Paste the snippet just before the closing
</body>tag of your confirmation page template. -
Deploy as part of your next release.
Variant B — Via standard (client-side) GTM
Section titled “Variant B — Via standard (client-side) GTM”-
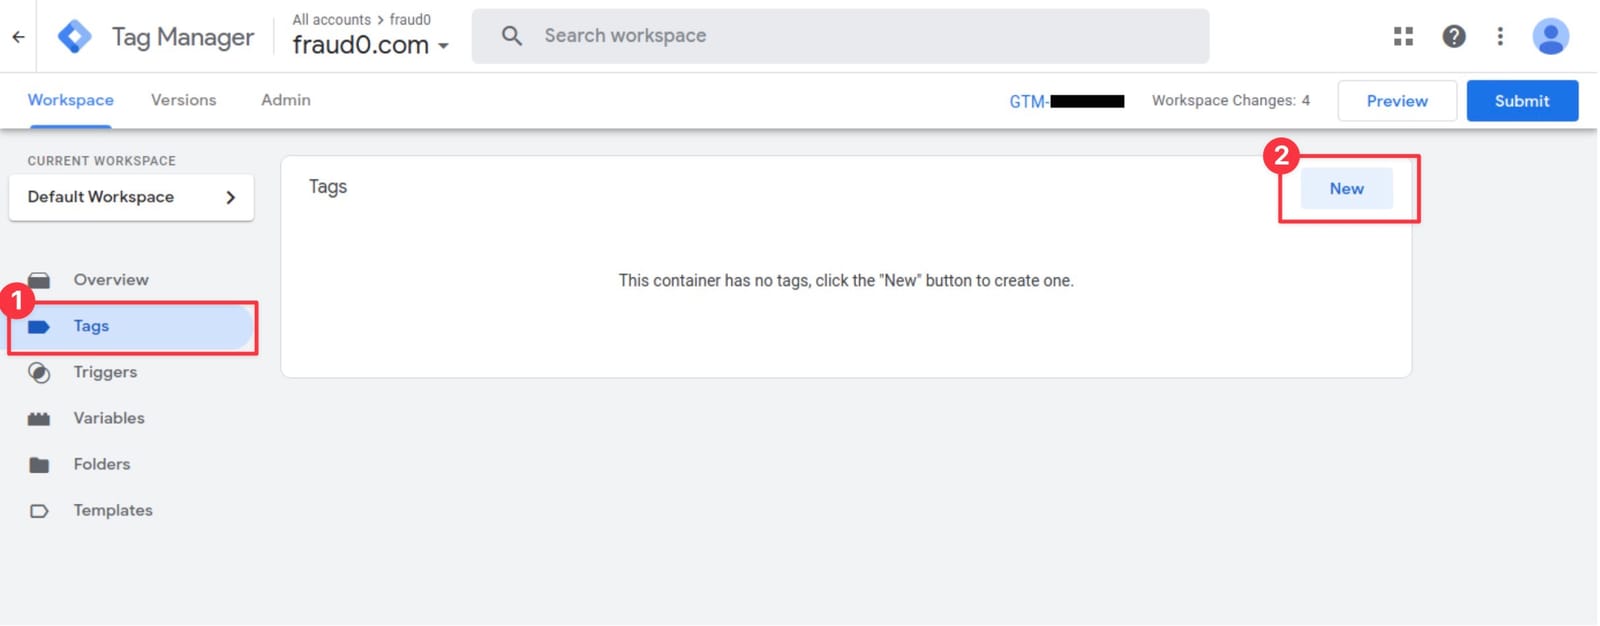
Go to your Google Tag Manager Workspace → Tags → New.
-
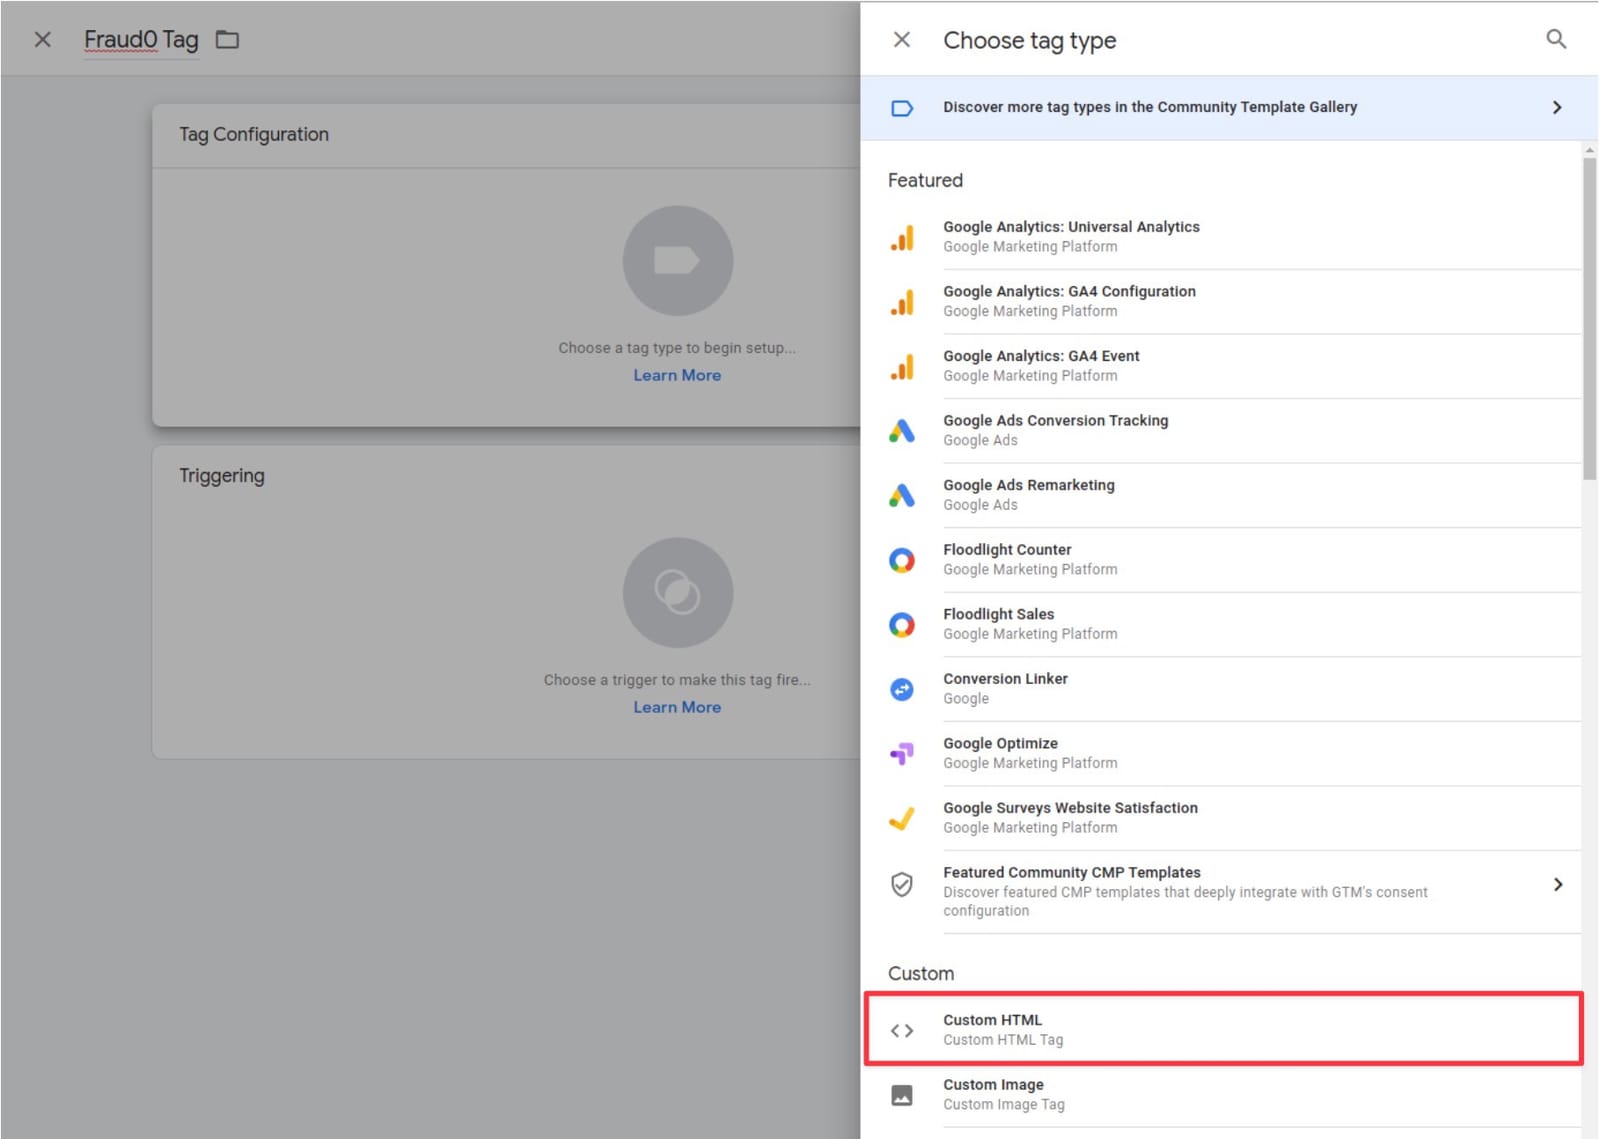
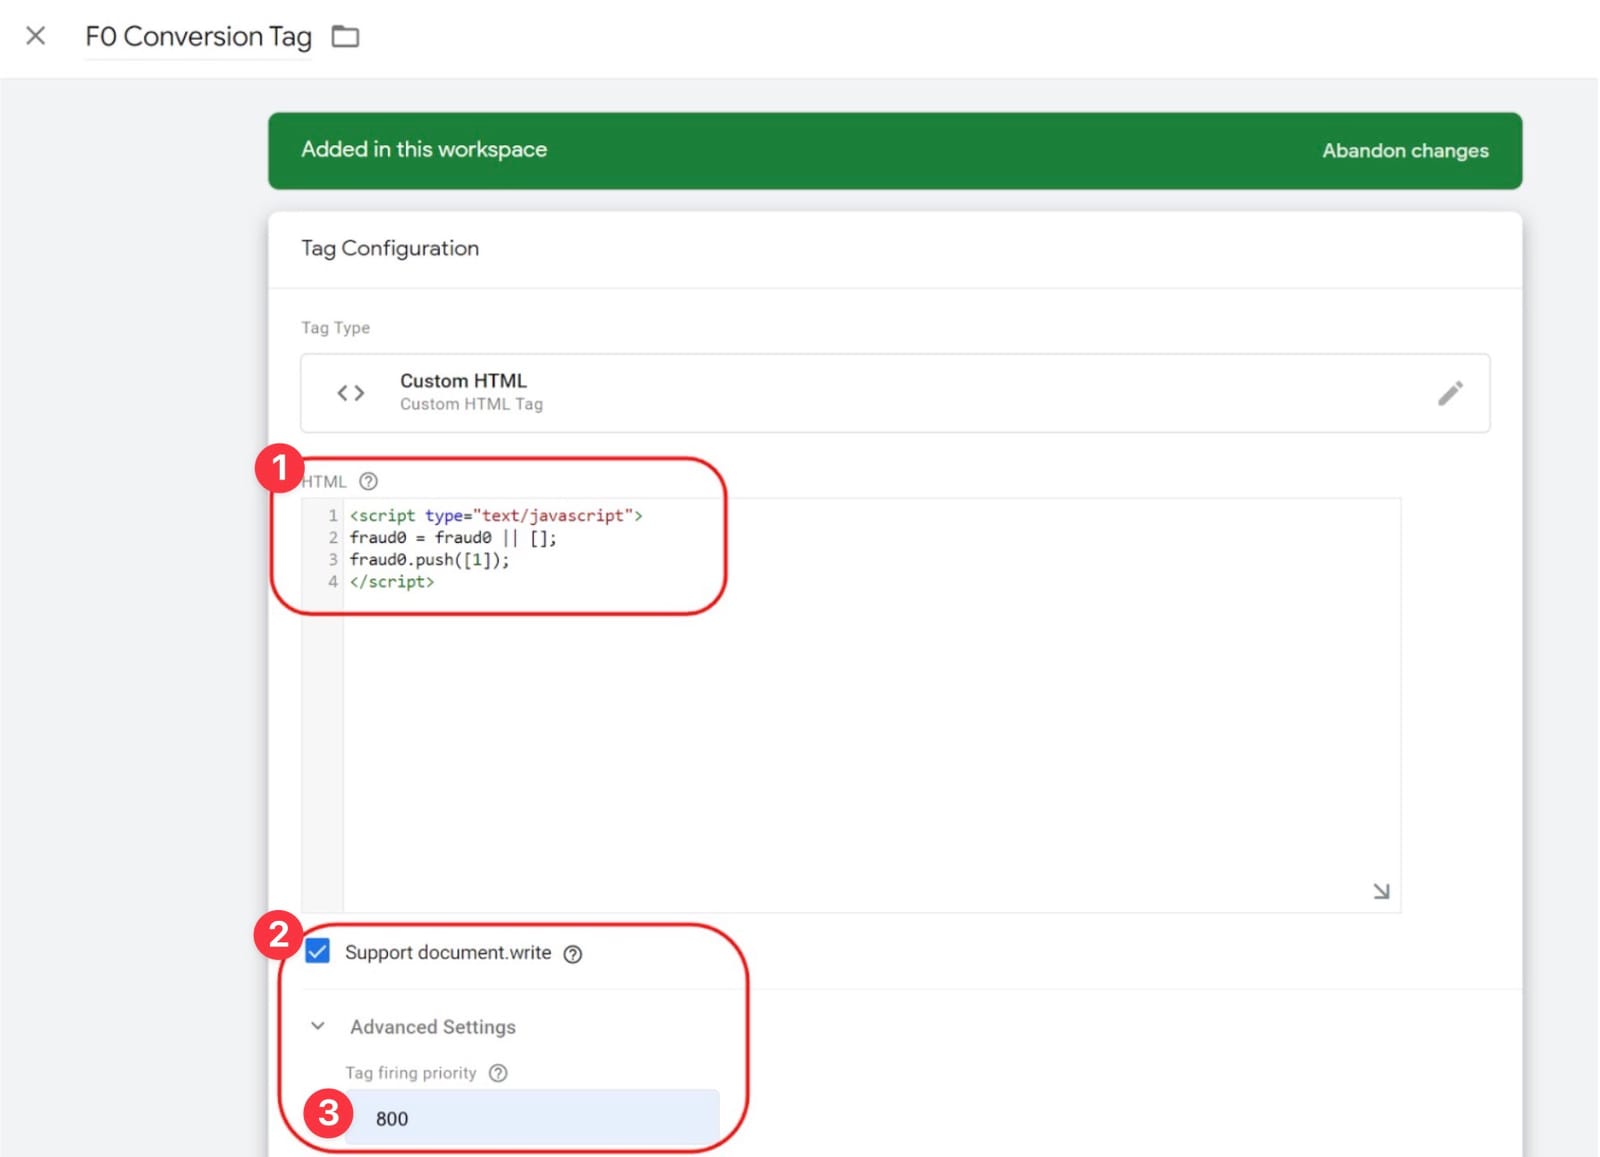
Name the tag F0 Conversion Tag → Tag Configuration → Custom HTML.
-
Paste the appropriate snippet. Check Support document.write. Set Tag firing priority to 800. Set Triggering to the confirmation page trigger.
-
Click Save and publish.
Imprint Privacy Policy Terms & Conditions DPA